Something is wrong. You can't find the source.
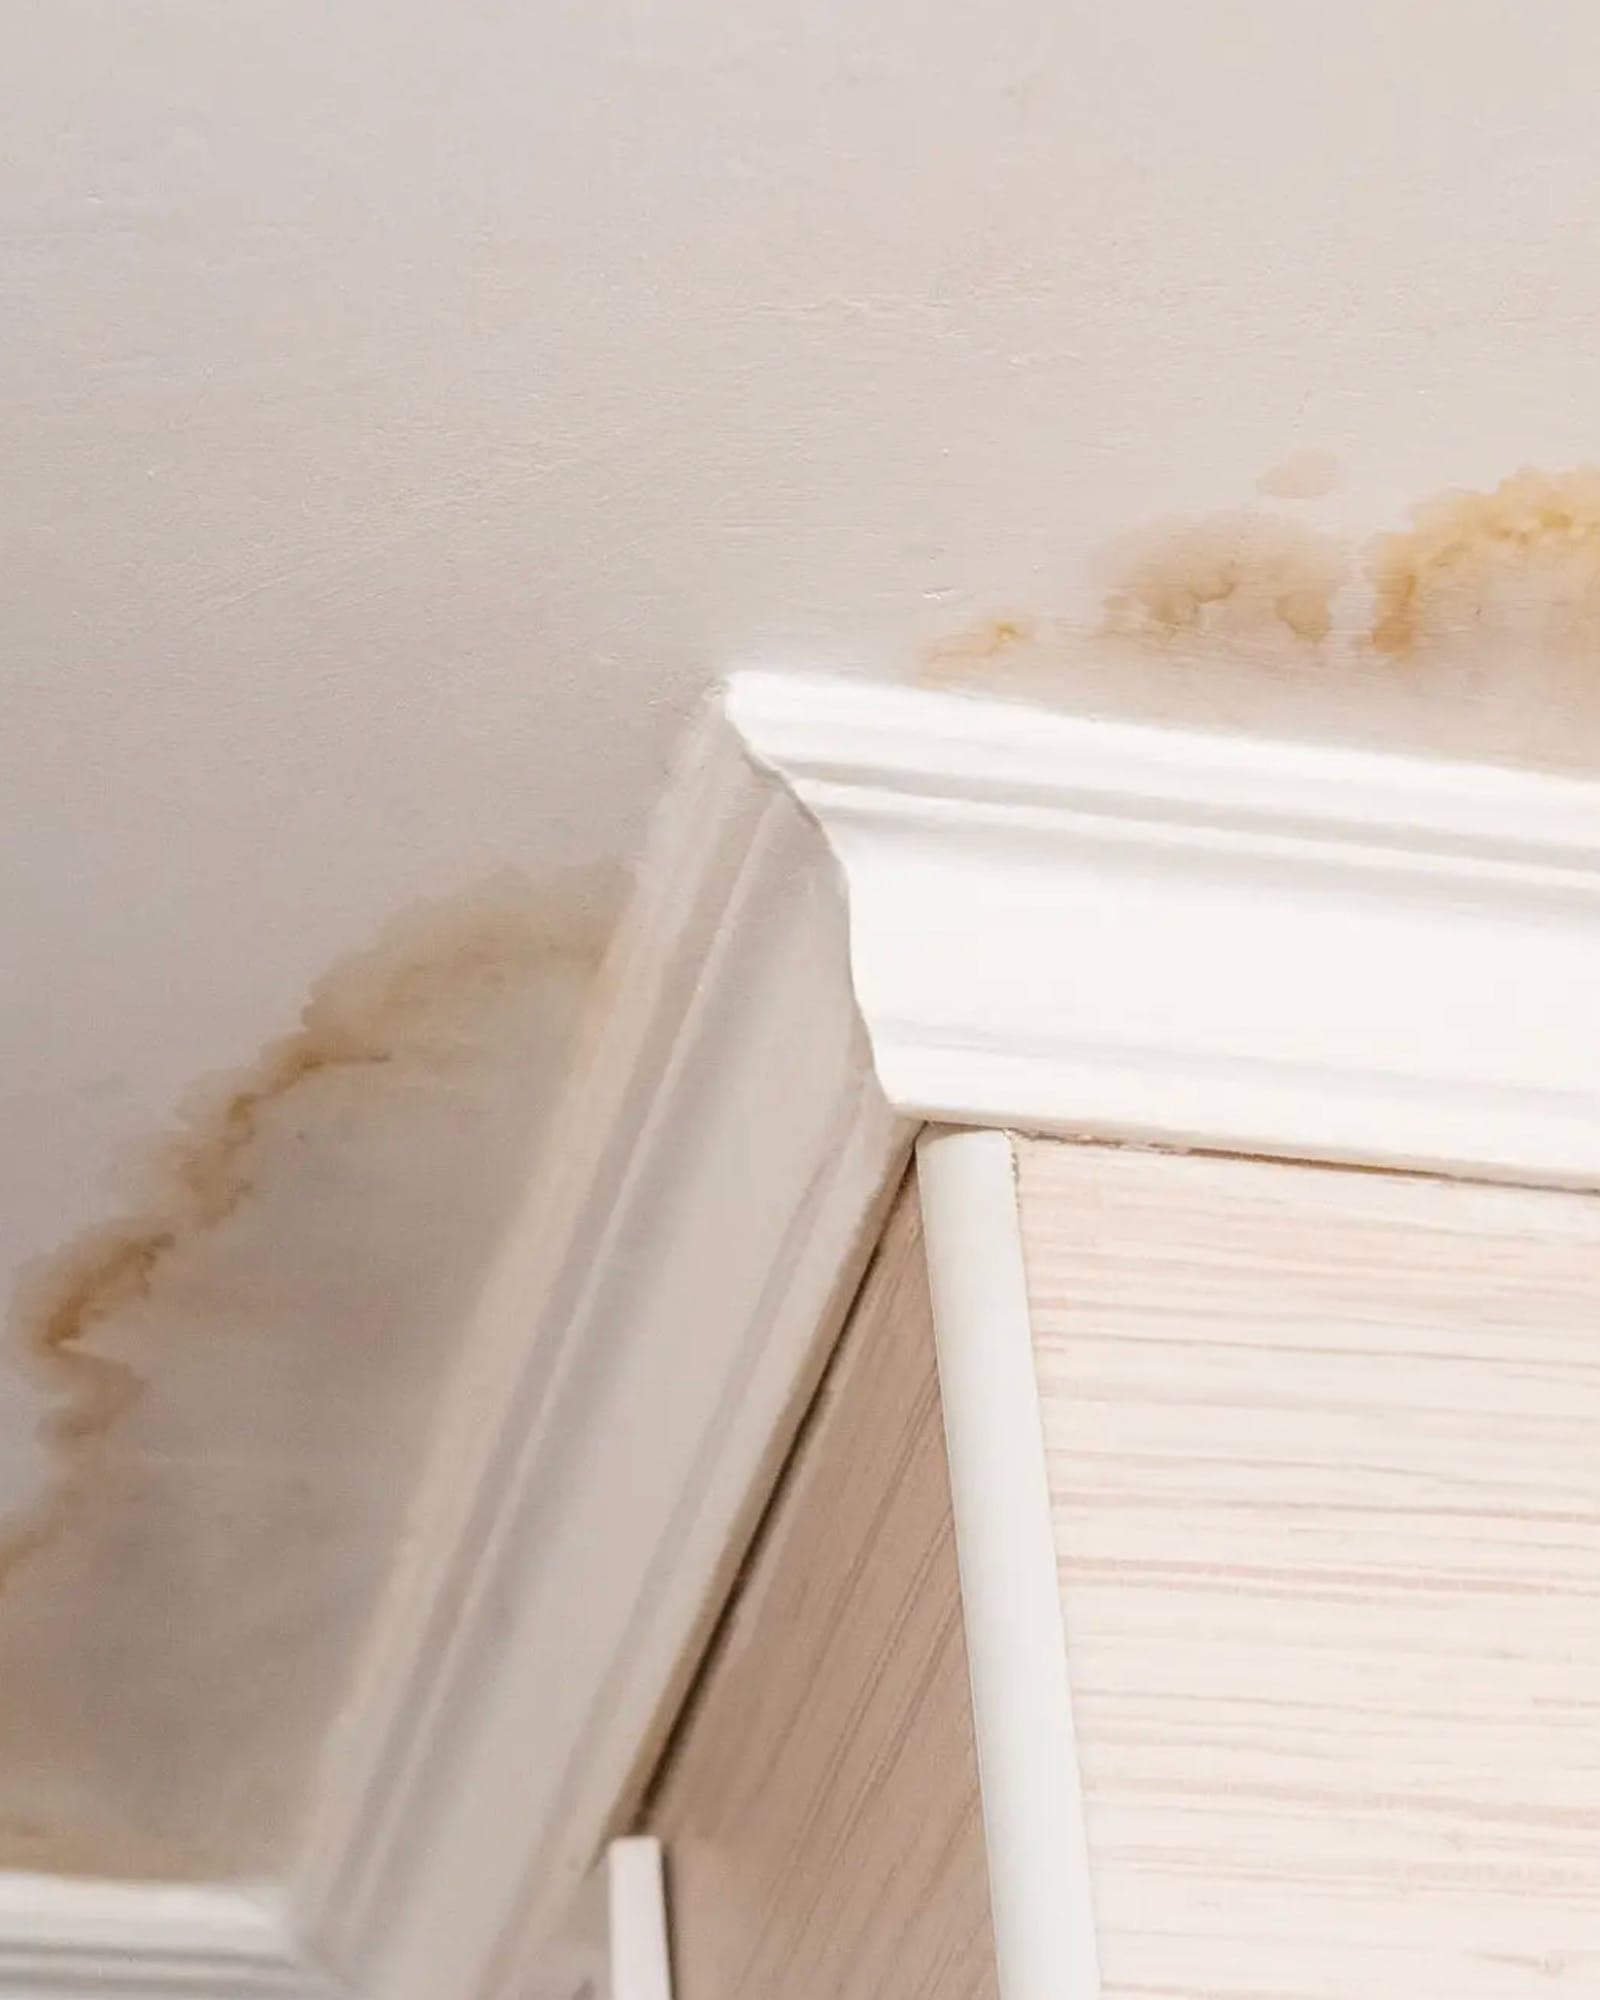
A stain that keeps returning. A mildew smell with no visible moisture. Water that only appears after rain. We work backward from the symptom until the source has a name and a location.
- Coverage
- Sacramento, Placer, El Dorado, Yolo, Sutter, Yuba, Butte, Nevada, Sierra
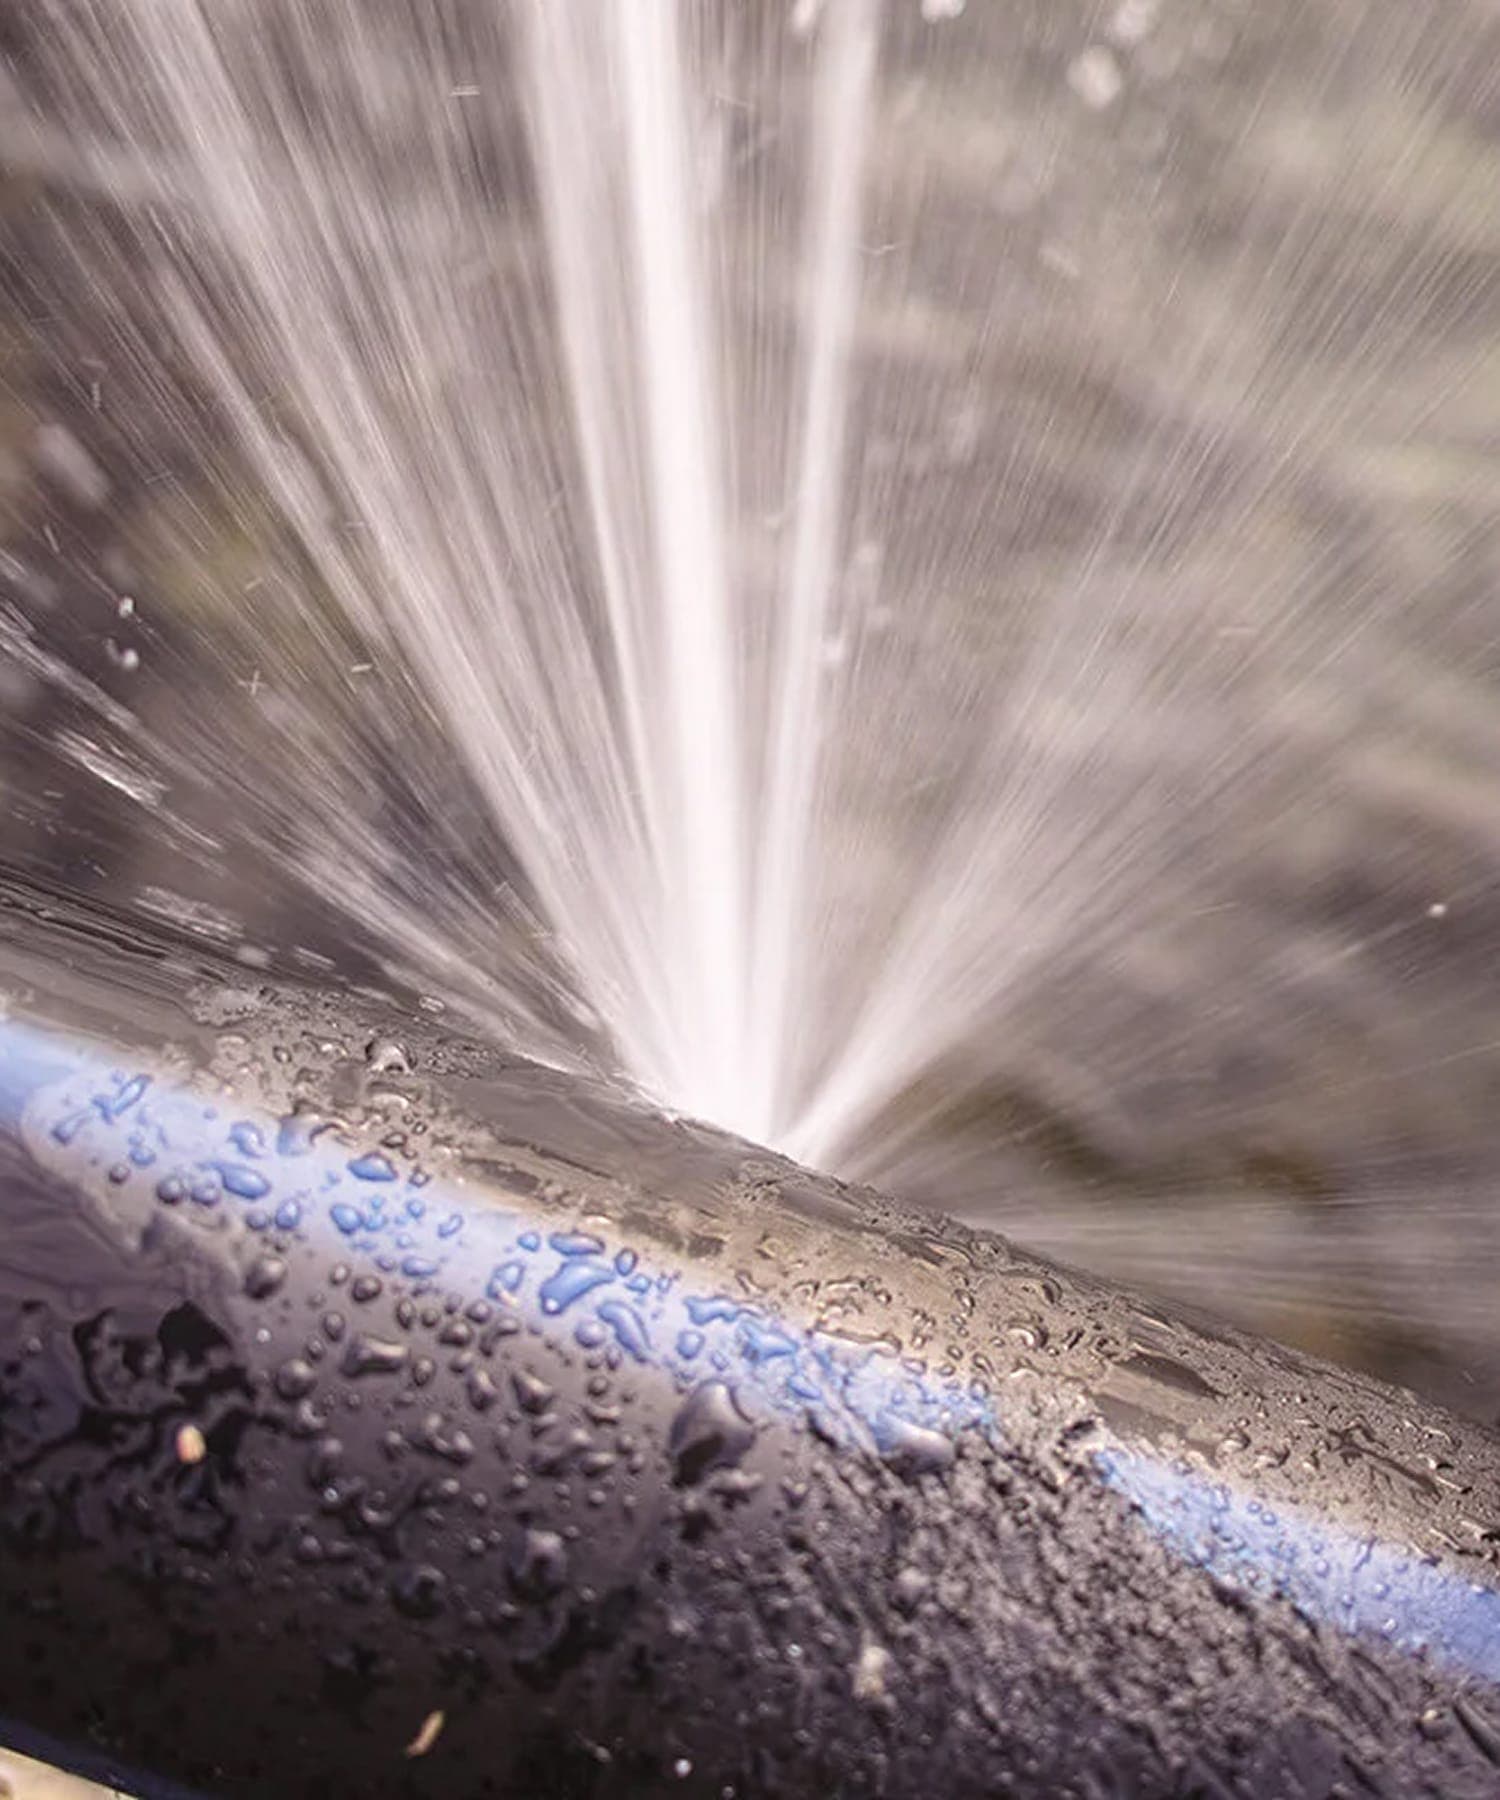
The stain is rarely where the leak is.
Mystery leaks earn their name because the entry point and the visible symptom are rarely in the same place. Water travels along studs, insulation, vapor barriers, and structural joints, then surfaces several feet from where it actually got in. A stained ceiling is a clue, not a location.
The cost keeps growing while the source is hidden. Materials stay wet, mildew establishes, finishes fail again after repair, and an insurance claim becomes harder to document. The first job is to find the source. The repair plan follows from that.
What to watch before you schedule a visit.
Five quick observations that sharpen the diagnostic, and sometimes reveal the source before a visit is needed.
- APhotograph the staining or moisture every day for a week. The pattern of growth points back toward the source.
- BNote whether symptoms correlate with rain, irrigation cycles, hot-water use, or laundry. Each pattern implicates a different system.
- CCheck the water meter with everything off. If the leak indicator moves, the source is pressurized plumbing rather than envelope intrusion.
- DLook for foundation cracks, gapped trim, failed window seals, or compromised flashing on the side of the building closest to the symptom.
- EIf a previous repair didn't resolve the symptoms, write down what was repaired, when, and what changed afterward. That history is part of the diagnostic.
If the meter sits still and the staining only follows rain, the leak is almost certainly entering through the building envelope, not the plumbing. We diagnose both.
Where mystery leaks come from.
Once the symptom is in front of us, the diagnostic narrows quickly. These are the entry paths we eliminate, one by one, until the water has somewhere to come from.
- 01Failed window or door seals that route water inside the wall cavity
- 02Foundation walls and floor-to-wall joints under hydrostatic pressure
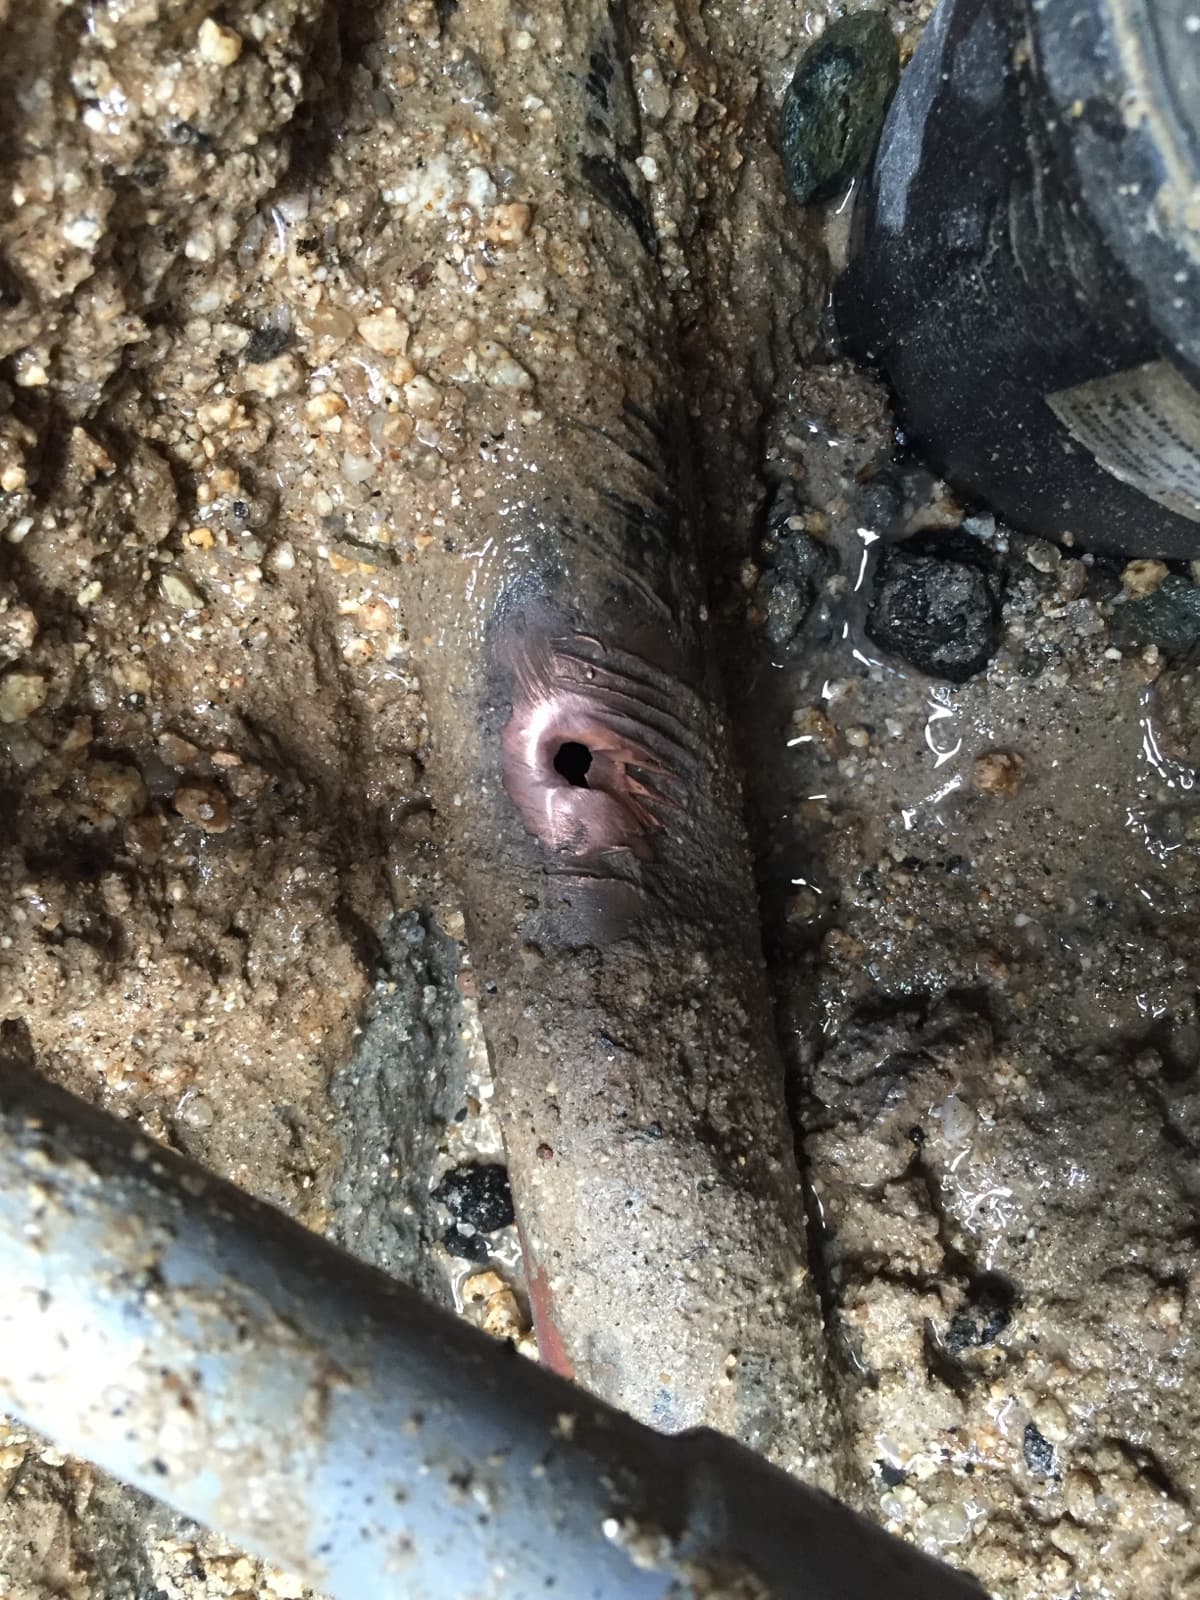
- 03Under-slab supply lines that surface as warm spots or unexplained meter movement
- 04Buried service lines between the meter and the structure
- 05Drain, waste, and vent lines that only show during specific fixture use
- 06Irrigation laterals and valves close enough to the building to track water in
- 07Pool, spa, fountain, and water-feature plumbing where loss only shows on the bill
Several of these paths have their own dedicated diagnostic protocols once we've isolated the source. Slab supply, irrigation, pool and water features, and sewer line each take a different toolkit.
How we work backward from the symptom.
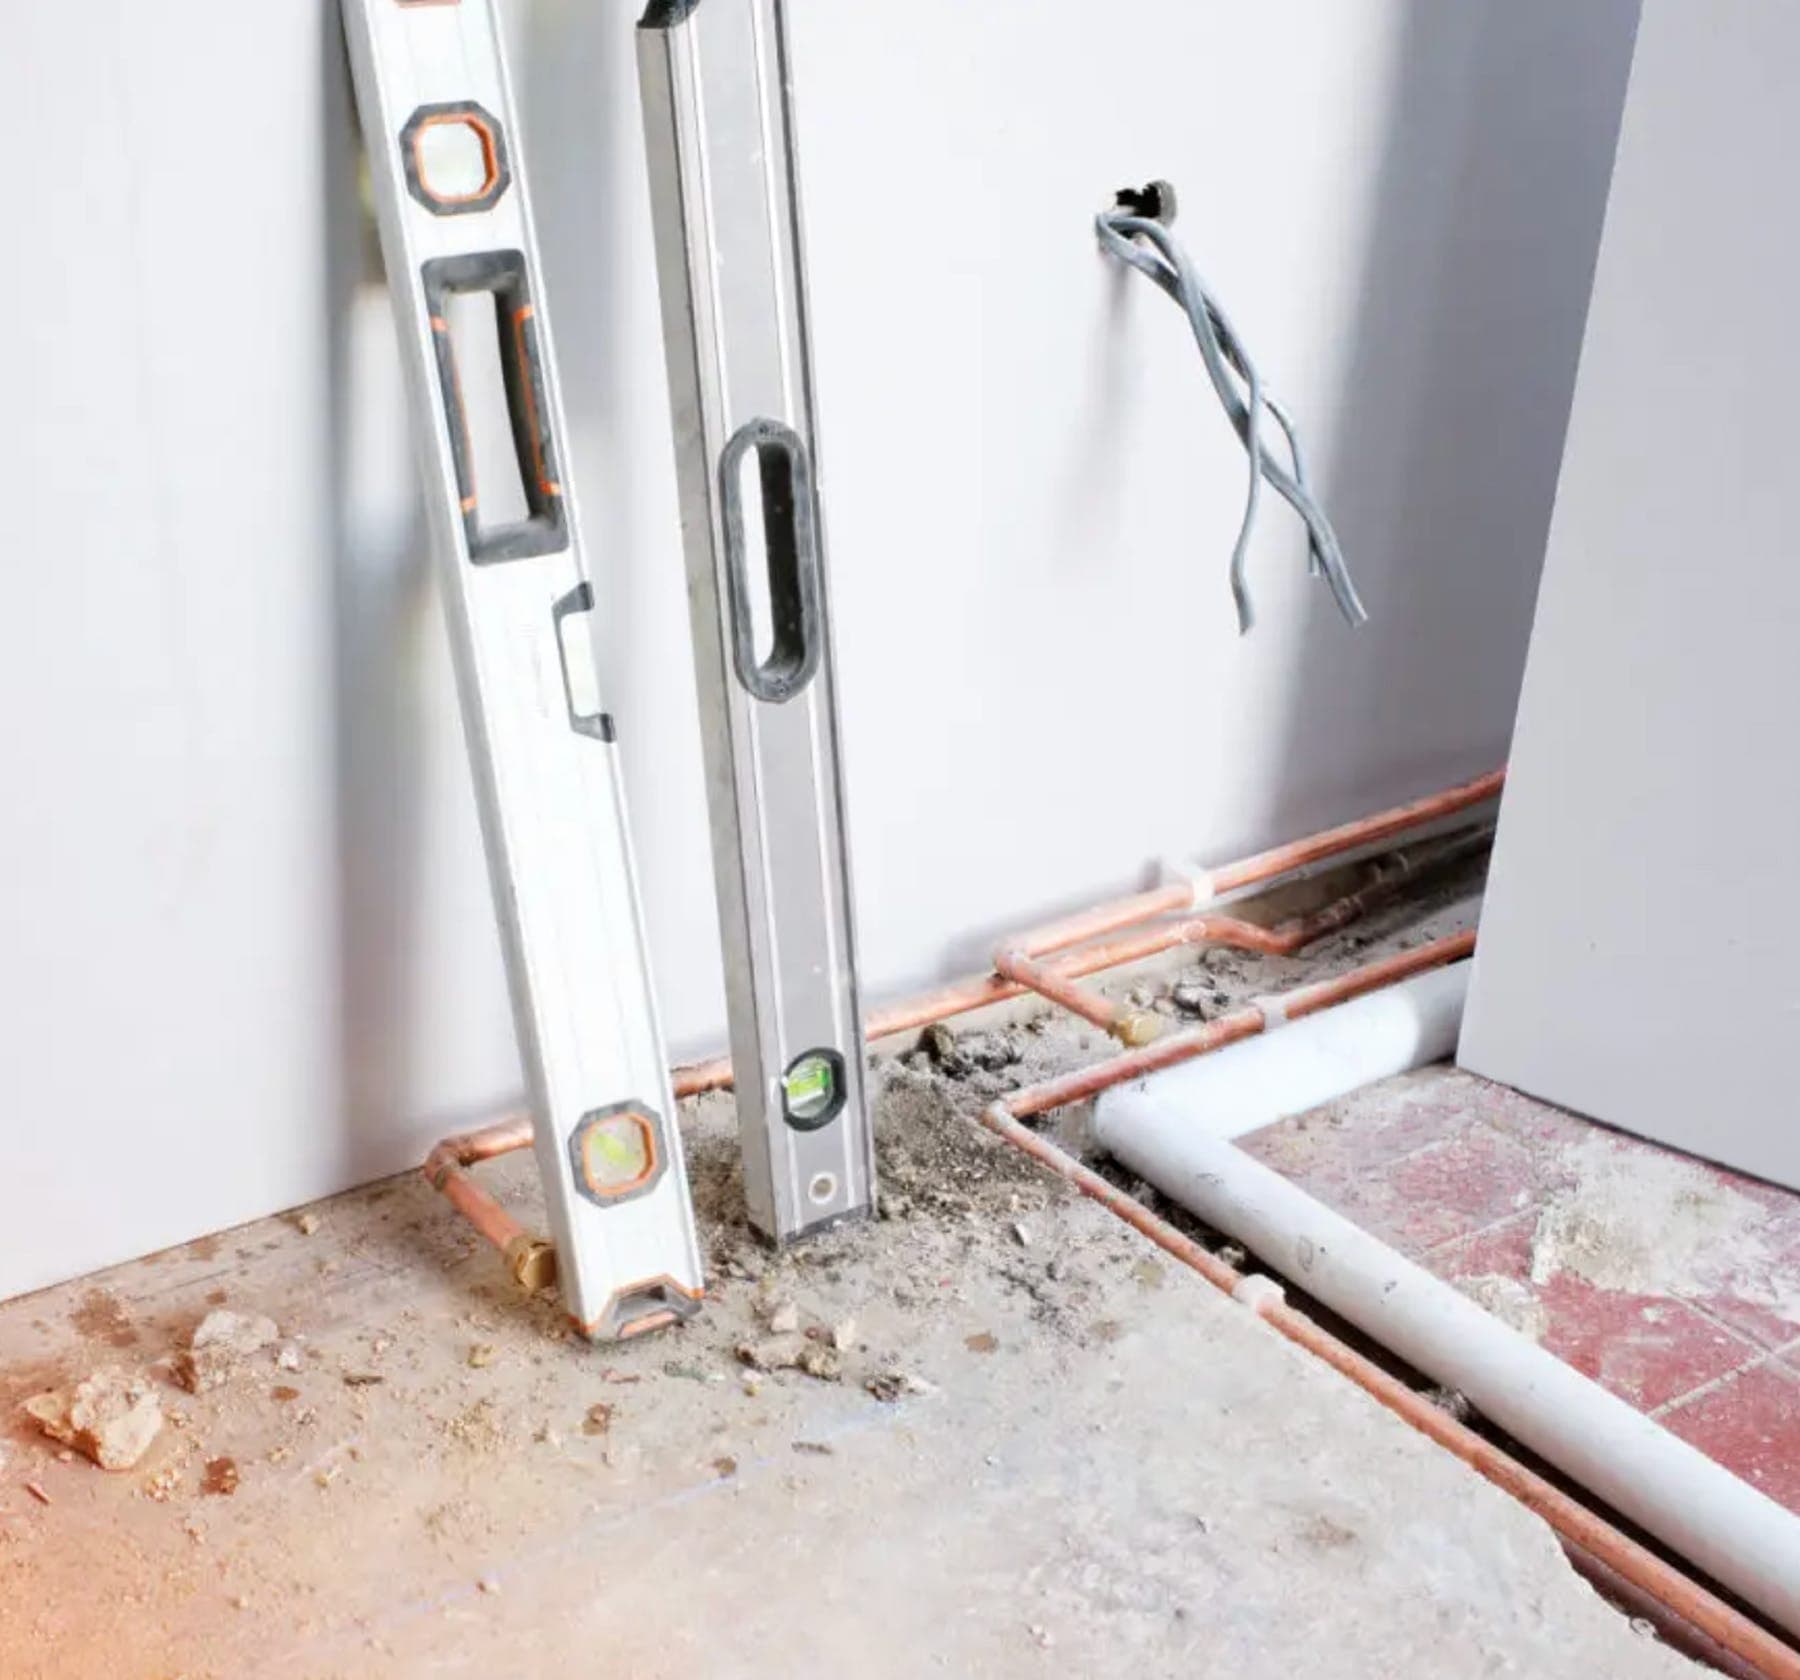
Cause-and-origin work starts with elimination. We catalog the symptoms, walk the affected area, and confirm what the meter is or isn't showing. That alone separates pressurized plumbing leaks from drainage and envelope intrusion, three completely different diagnostic paths.
From there the toolkit follows the lead. Thermal imaging reveals where moisture has affected walls, ceilings, and floors by the temperature differential it creates. Acoustic listening picks up pressurized plumbing at the leak point. Pressure isolation confirms which system is losing water. Dye testing confirms a suspected fixture. Sewer cameras and vapor testing handle waste and drain systems. The right tool depends on what the symptoms have already told us.
Every inspection ends with a written report: findings, methods used, the identified source, and what was eliminated along the way. If the situation is an insurance claim, the report is the documentation your adjuster needs.
- Tools on hand
- Thermal cameras, acoustic ground mics, line tracers, sewer cameras, dye
- Visit pricing
- Priced by test type, not by the clock
When to call a cause-and-origin specialist.
If any of the following describe your situation, the next step is a cause-and-origin visit, not another exploratory repair.
- 01A previous inspection or repair did not stop the symptoms
- 02Staining or soft spots return after drying or painting
- 03Water only appears after rain, snowmelt, or saturated ground
- 04Mildew smell returns without a visible moisture source
- 05Your meter moves with no fixtures running
- 06Your water bill rose and your usage didn't change
- 07Your insurance carrier needs documented cause and origin
- 08A plumber or contractor recommended we locate the source first
Questions we hear most.
Short, plain answers to the questions homeowners, property managers, and insurance adjusters ask before scheduling a cause-and-origin visit.
What is cause-and-origin leak detection?
It's the process of identifying both where water is entering and how it's getting there, when a standard plumbing inspection hasn't produced an answer. We use thermal imaging, acoustic listening, pressure isolation, and visual inspection in sequence to trace water back to a confirmed source.
How is this different from a regular leak detection visit?
A regular visit usually starts with a known system: a pressurized line, a sewer line, an irrigation supply line. A cause-and-origin visit starts with a symptom and works backward, because the system involved isn't yet known. The toolkit is broader and the visit takes longer.
Can thermal imaging find leaks without opening walls?
Often, yes. When moisture from a leak has reached the wall, ceiling, or floor material, a thermal camera makes the temperature difference visible without removing any surface. A thermal camera is not an X-ray, though: if the moisture has not yet affected the surface material, the camera alone will not see it, which is why it is one tool in the sequence and not the whole test.
Do you provide documentation for insurance claims?
Yes. Every cause-and-origin inspection ends with a written report: the identified source, the methods used, and the systems eliminated along the way. The format is accepted by insurance adjusters and supports a contractor's scope of repair.
What if a previous inspection didn't find the leak?
That's exactly the situation cause-and-origin work is built for. The toolkit and the process of elimination are built for exactly the symptoms that resist a standard diagnostic.
How long does a cause-and-origin visit take?
Most visits run up to 1.5 hours. The test is priced by type, not by the clock, so a faster visit costs the same and gets the same written report.
Is cause-and-origin only for water leaks?
No. The same diagnostic approach applies to moisture from any source: drainage backflow, condensation, envelope intrusion after rain, irrigation overspray collecting in foundation cracks. The water just has to be coming from somewhere.
Every wrong repair gets more expensive than the last.
Until the source is confirmed, every repair is a guess. Drywall gets opened in the wrong place, flooring gets replaced before the leak is stopped, and an insurance claim runs into trouble for lack of documented cause and origin. Finding the source first is the cheapest part of the work.
The stain is a clue. The source is somewhere else.
- Call
- (916) 331-6443
Mon–Fri · 8a–5p · CA Lic. #393393 · Bonded & insured