We'll find the leak without opening the wall.
Acoustic listening, thermal imaging, and pressure isolation pinpoint pressurized water leaks behind walls, under floors, underground, and inside ceilings. Nothing is opened until we know exactly where to open it.
- Coverage
- Sacramento, Placer, El Dorado, Yolo, Sutter, Yuba, Butte, Nevada, Sierra
Pressurized water makes a sound our equipment can isolate.
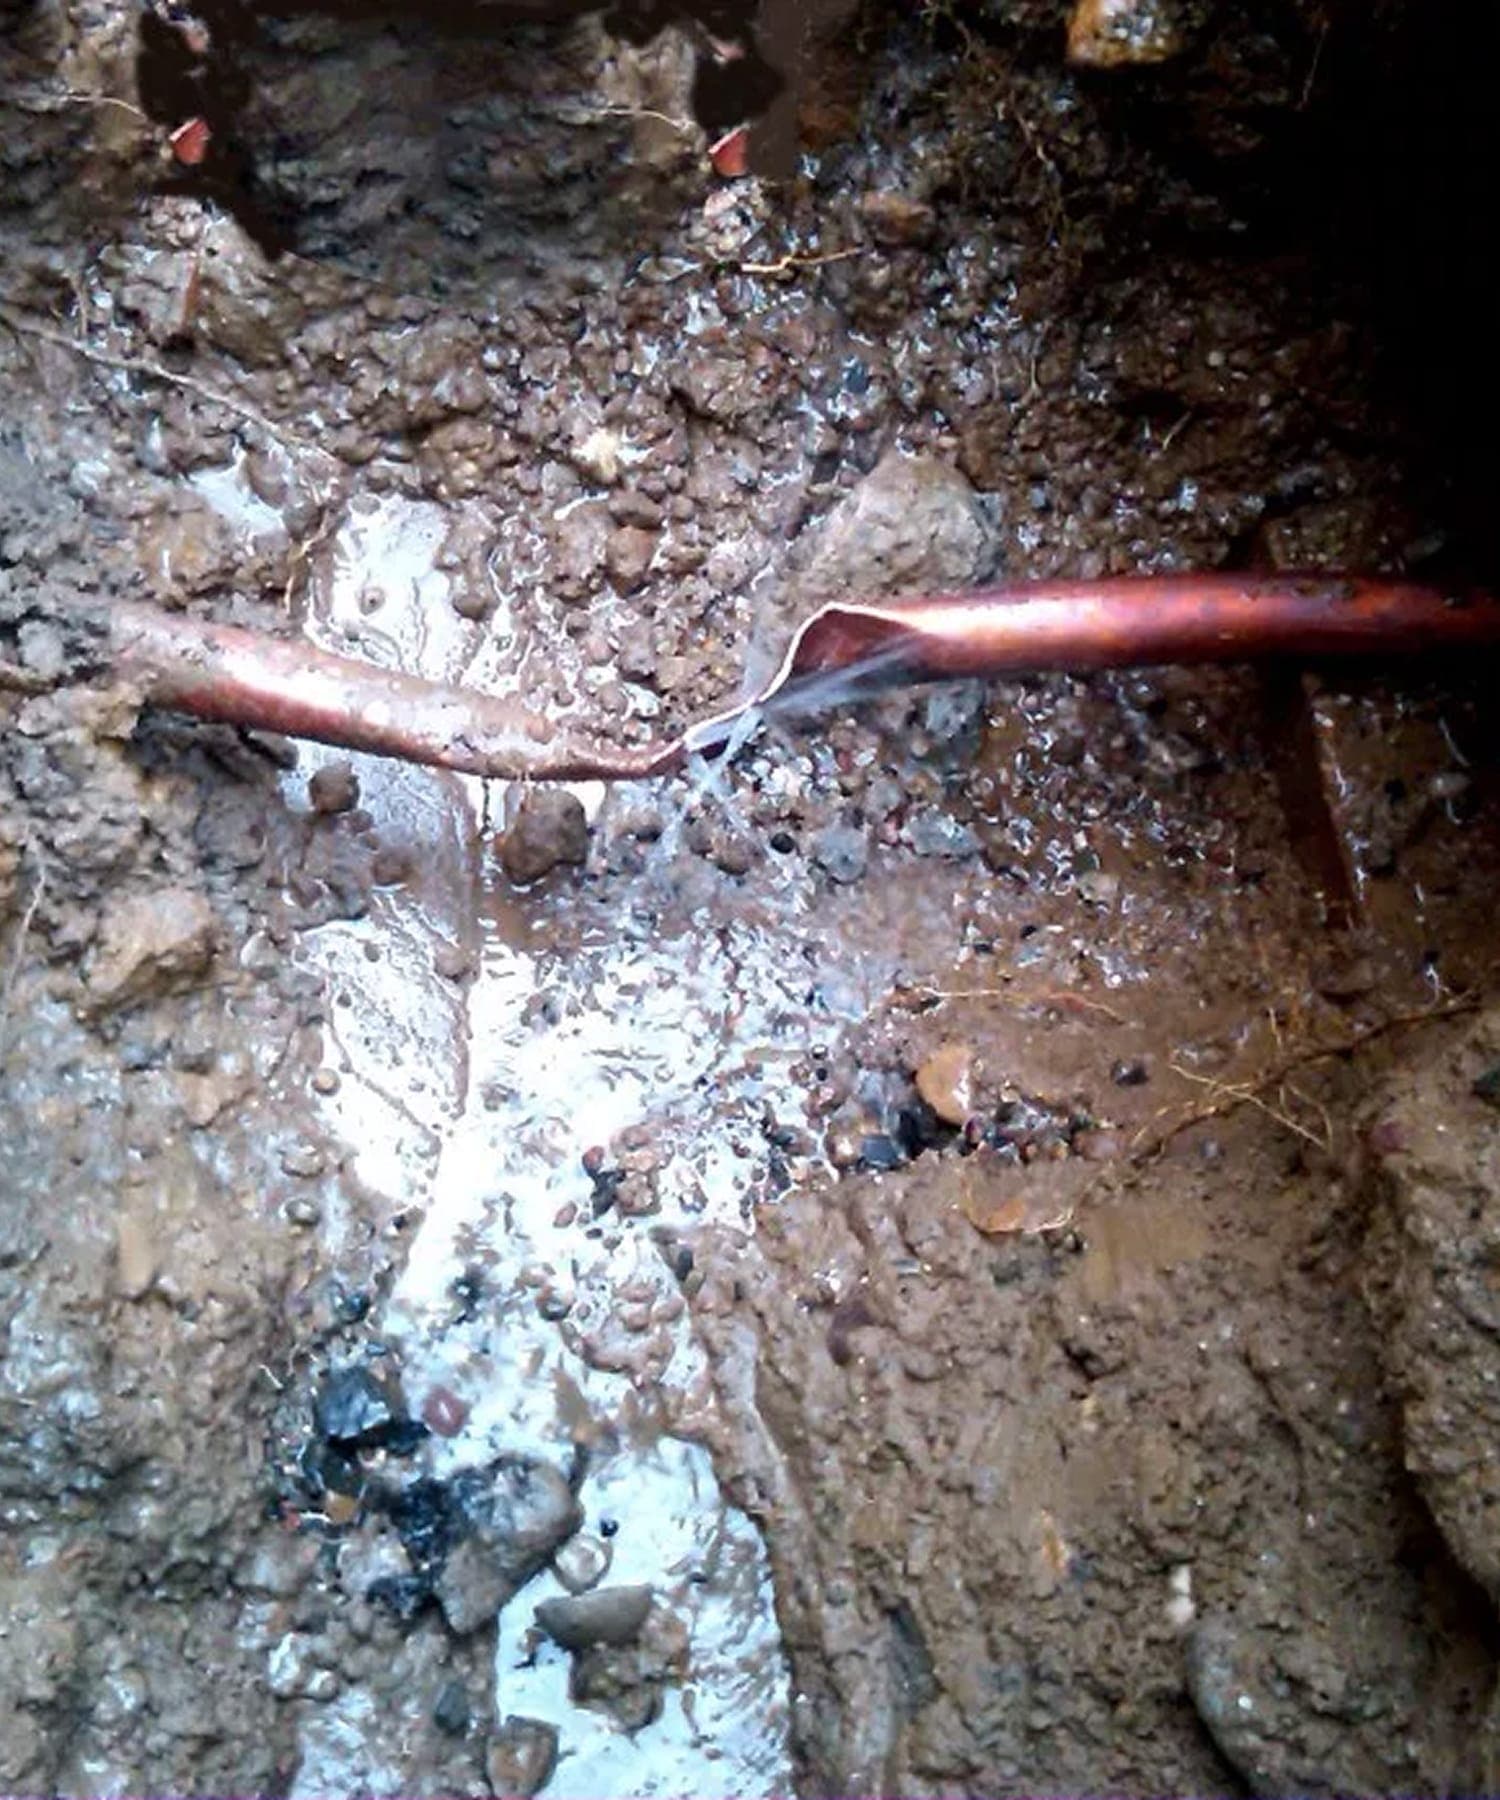
Pressurized water escaping a pipe makes a sound. It's small, high-pitched, and continuous, and at the right frequency it carries through drywall, tile, finished flooring, and several feet of concrete. An acoustic ground microphone and a trained ear isolate that signature so the technician can mark the leak location.
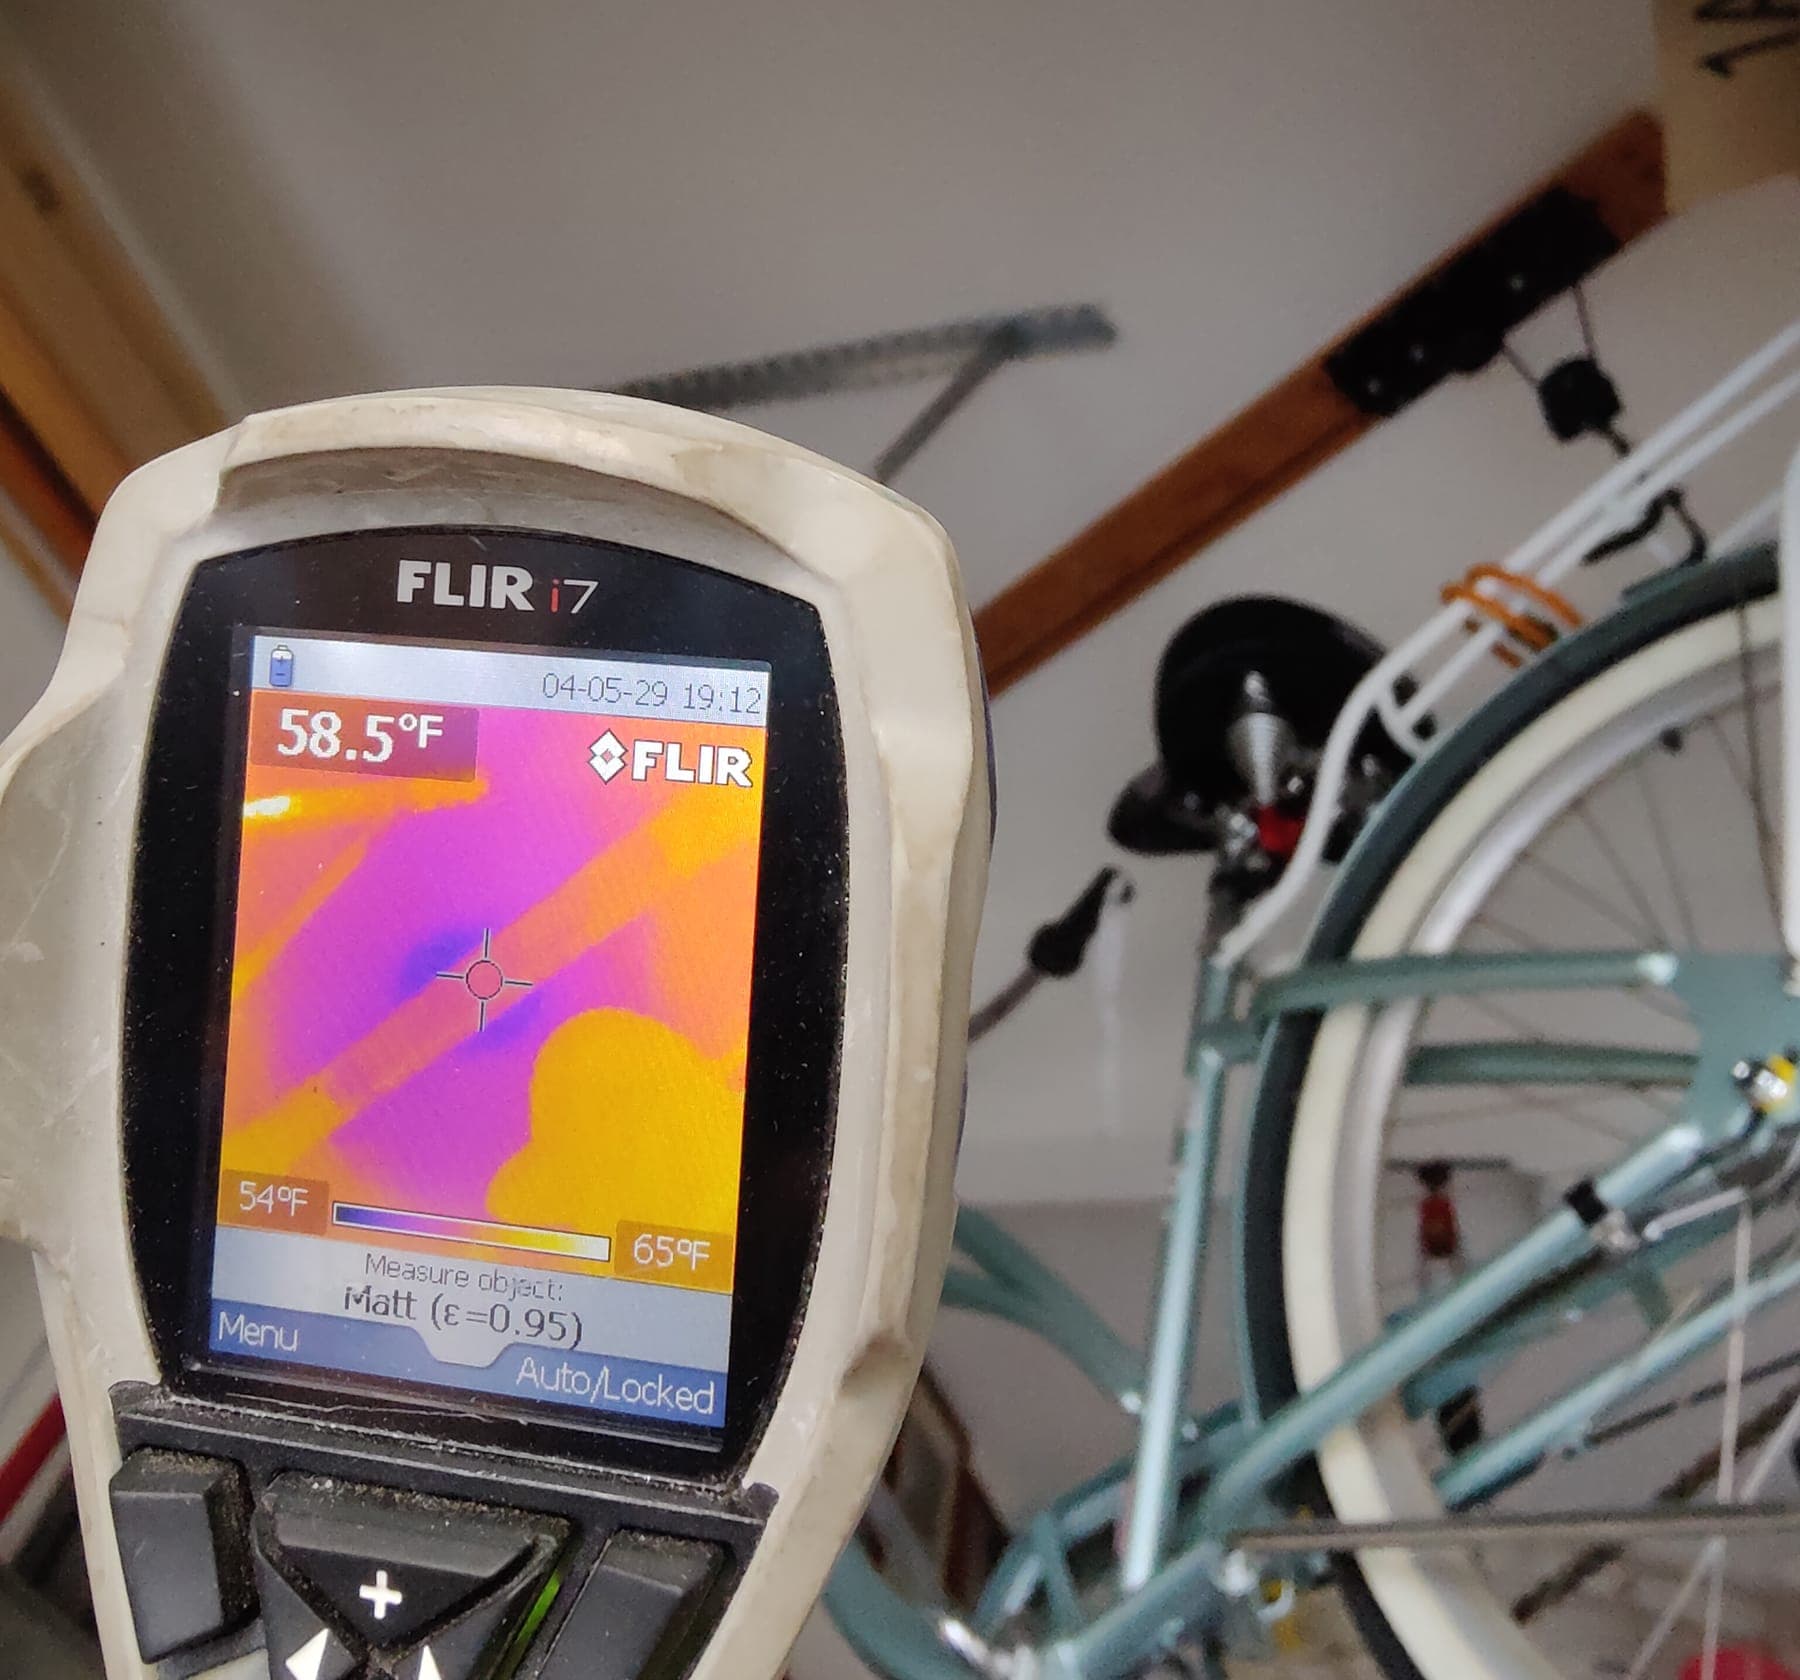
Thermal imaging adds a second axis when moisture has affected the surface material. Wet building materials hold and release heat differently than dry ones, and an infrared camera can make that difference visible. Sound, pressure, and moisture clues work together before the wall is opened.
What to note before we arrive.
Five quick observations that turn a whole-house inspection into a focused eight-foot scan.
- AShut off every fixture and watch the meter for 30 minutes. Movement means pressurized water is still going somewhere.
- BListen at a quiet hour for water running in the walls. The direction of the sound is often the room.
- CWalk the floors barefoot or with the back of a hand on tile and slab. A warm patch can mean hot water is pooling at a low spot under the slab. It tells us which room to start in, though not the exact location of the break, which is what the test is for.
- DPhotograph any visible staining, swelling, or discoloration, and the closest plumbing fixture to it.
- EIdentify the room above any ceiling stain. Water moves down, but along framing it can travel several feet before it surfaces.
Each of these observations narrows the inspection.
Where we listen, scan, and find.
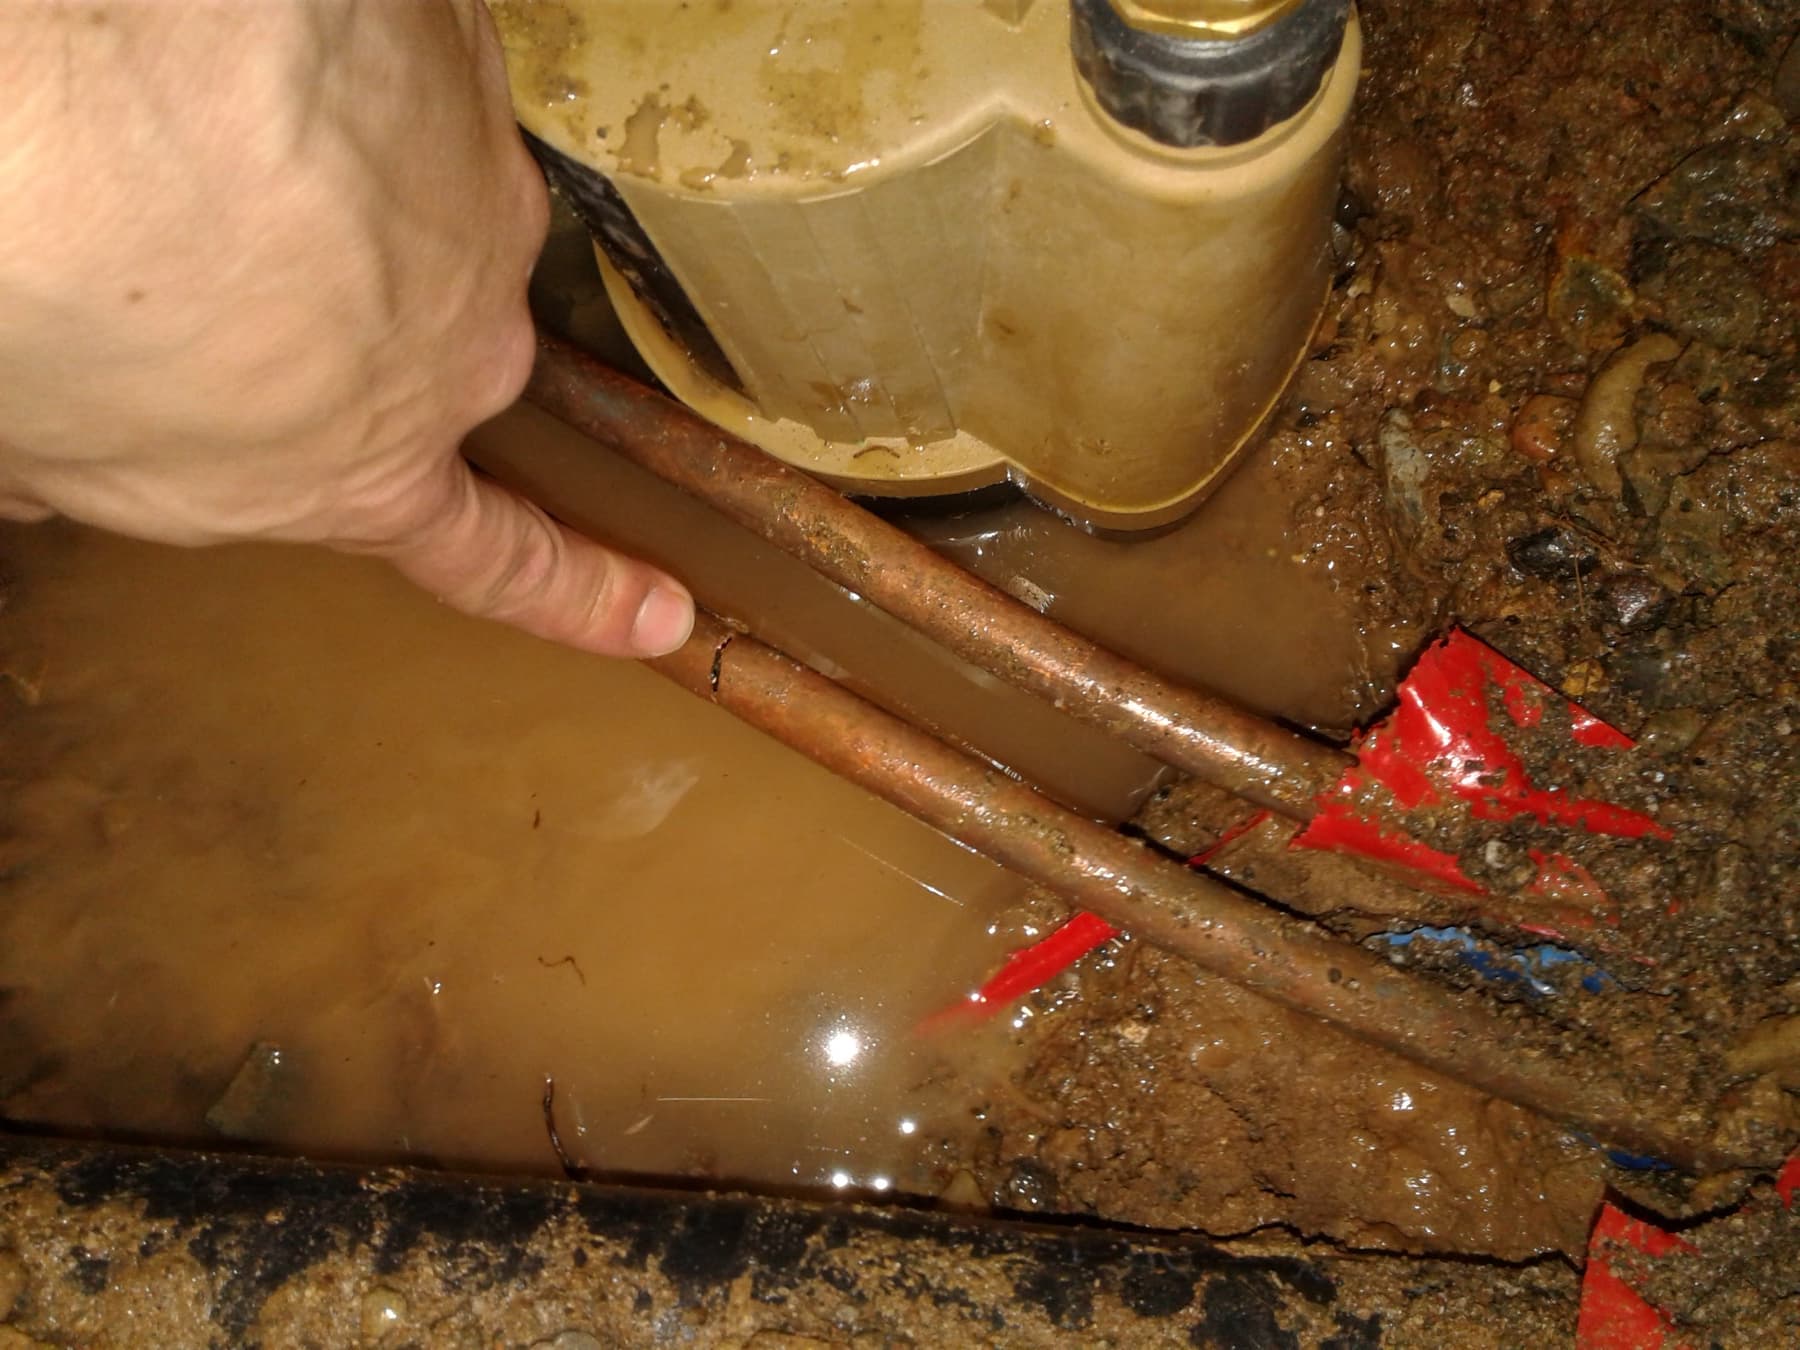
Most hidden leaks live in a small set of places. We work systematically through the likely paths and let the equipment confirm the location before any surface is opened. Leaks under a concrete slab have their own dedicated diagnostic (see slab leaks for that toolkit).
- 01Inside finished wall cavities, where acoustic and thermal locate the source
- 02Above ceilings, including upstairs bath plumbing over downstairs living spaces
- 03Under-floor between joists in raised-foundation homes
- 04Inside attic supply and DWV runs serving second-floor bathrooms
- 05Beneath cabinets, behind tile, and inside vanity backs
- 06Around water heaters, softeners, recirc pumps, and pressure tanks
- 07Inside crawlspaces below kitchens, baths, and laundry rooms
- 08At pressurized fittings inside finished mechanical chases
Once the location is confirmed, the repair can open one hole in the right place, not three exploratory cuts in the wrong ones.
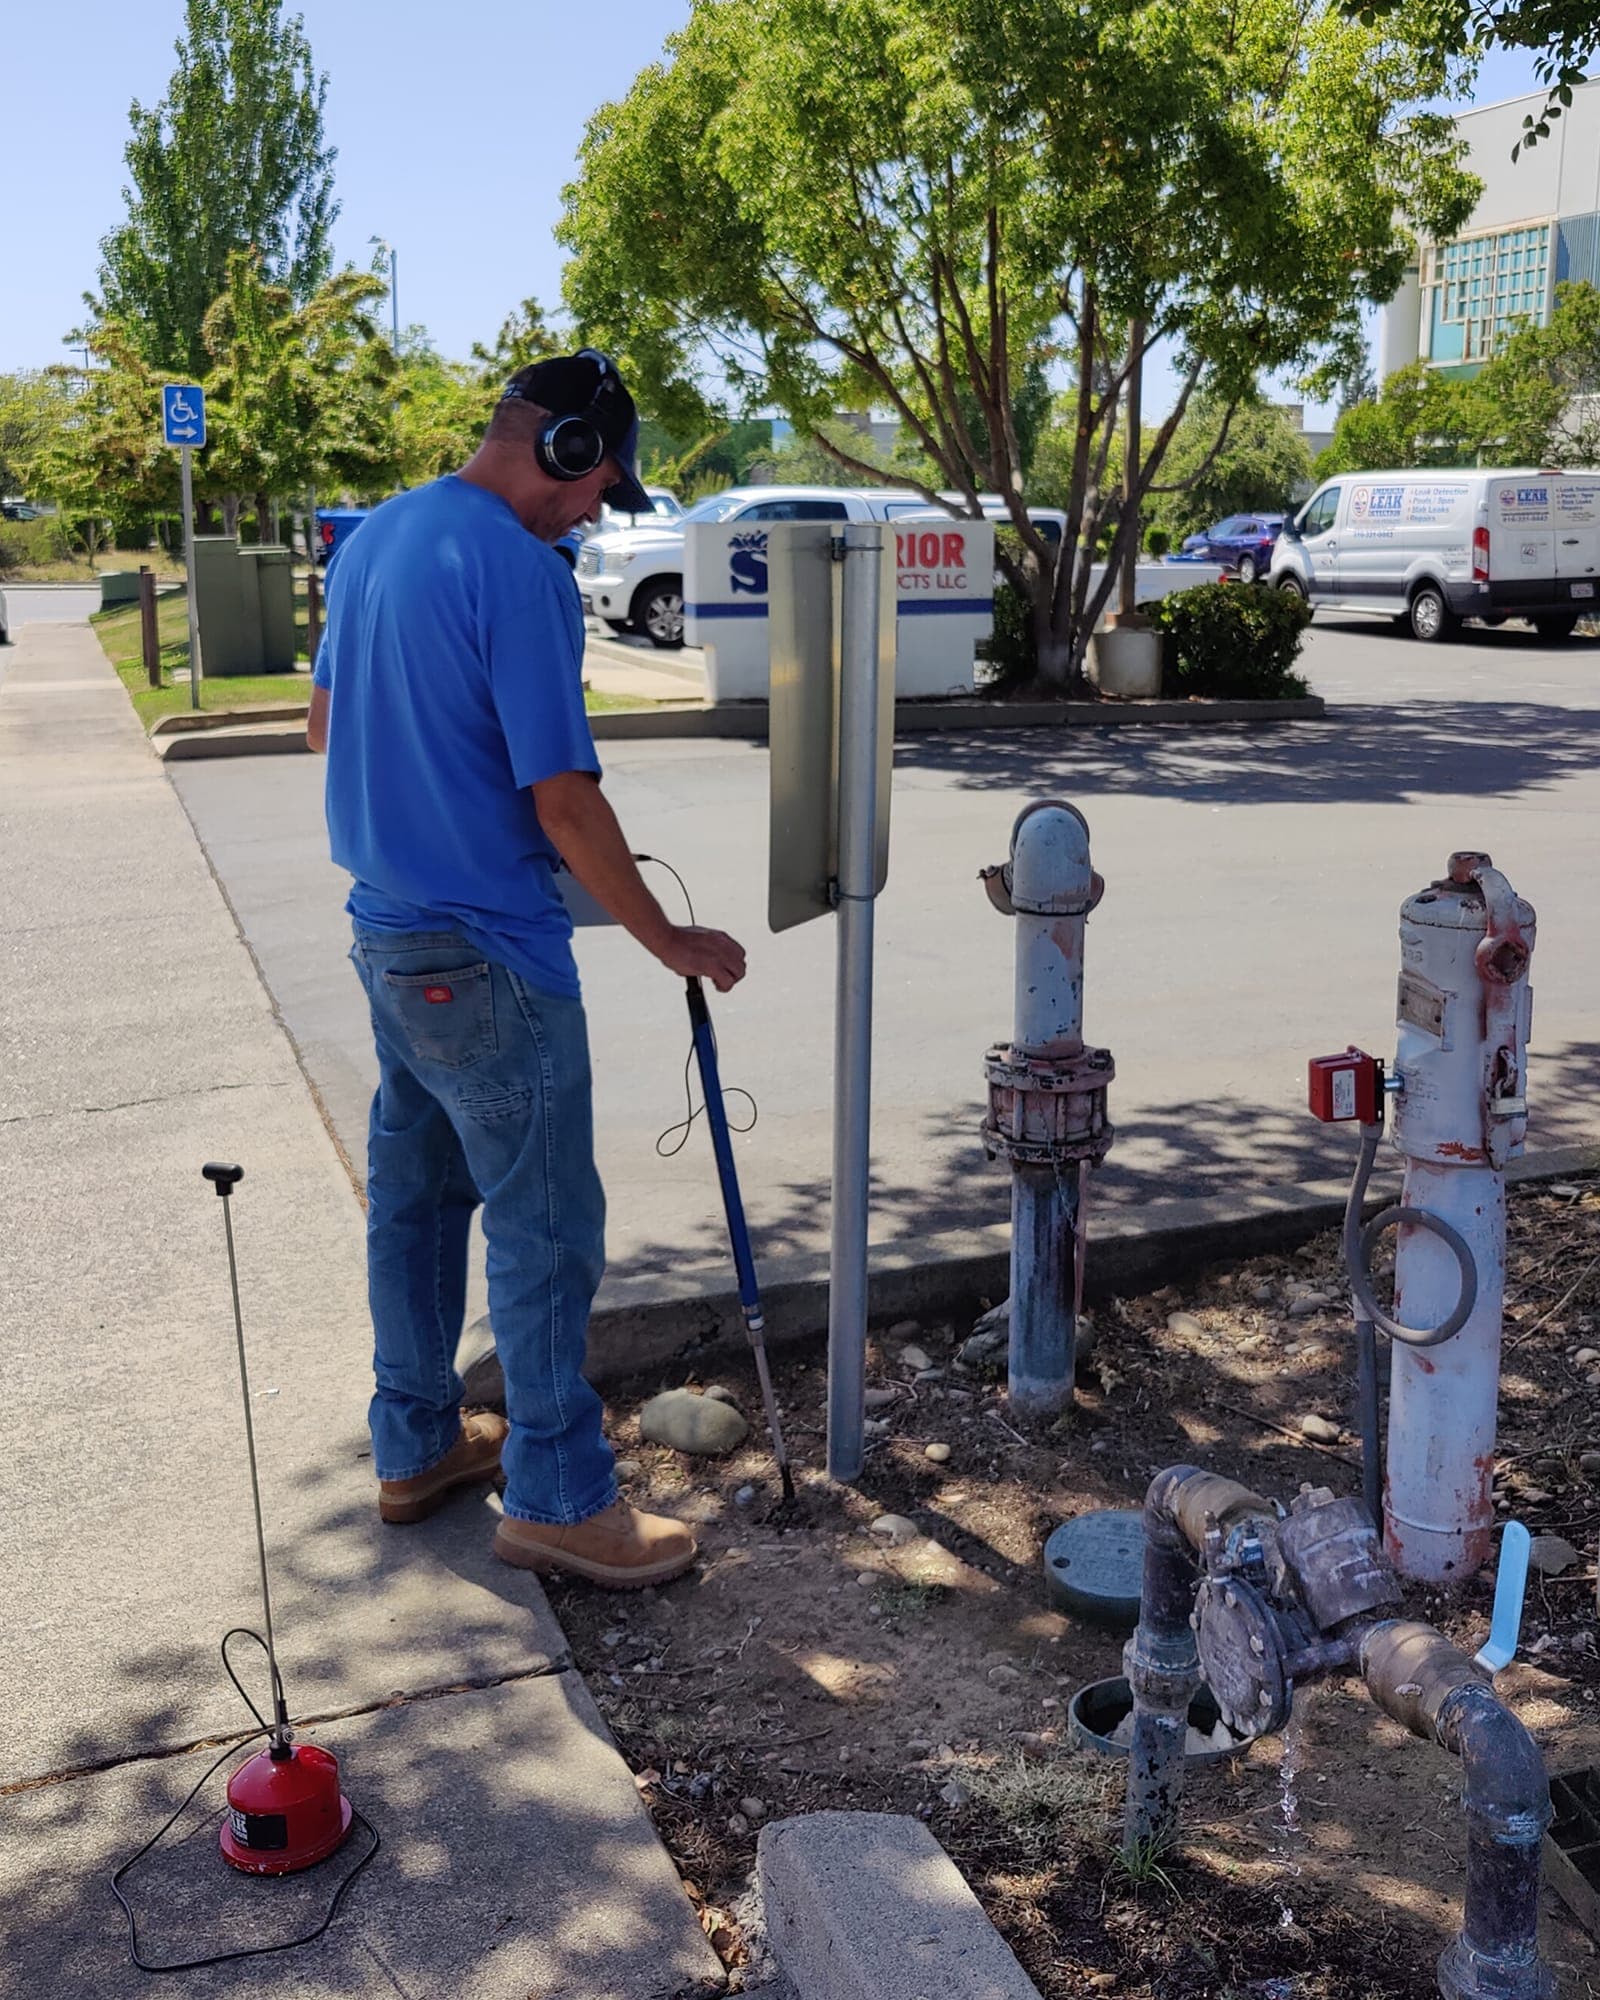
We start by listening.
We start with a system-level check: meter reading, fixture isolation, pressure observation. That confirms the leak is pressurized supply and not a drain, a drip, or an envelope issue. From there the toolkit follows the signal.
Acoustic ground microphones locate the leak by sound, the small, high-frequency hiss of water leaving a pipe under pressure. Thermal cameras add a temperature read on wet building materials behind finished surfaces. Pressure isolation confirms which run the leak is on. Moisture meters help confirm the location.
The deliverable is a marked location and a written report, and because we also perform the repair, the next step is already scheduled with the people who found the leak. You know exactly what was found, plus what was eliminated along the way.
- Tools on hand
- Acoustic ground mics, thermal cameras, moisture meters, line tracers, pressure gauges
- Visit pricing
- Priced by test type, not by the clock
When to call for hidden leak detection.
If you're confident the leak is in your plumbing (supply or drain) and the goal is to locate it without cutting anything until you have to, this is the visit.
- 01You hear water running with no fixtures open
- 02A stain or wet spot is showing on a finished surface
- 03Your meter moves with everything shut off
- 04A warm patch on the floor follows a hot supply line
- 05Moisture is showing in a cabinet, closet, or vanity
- 06The source needs to be located before anyone cuts anything
- 07You're remodeling and want pressurization verified before drywall closes
- 08A previous repair did not stop what you were seeing
Questions we hear most.
Short, plain answers to the questions homeowners and contractors ask before scheduling a hidden-leak inspection.
How does acoustic leak detection actually work?
Water under pressure escaping a pipe produces a continuous high-frequency sound. An acoustic ground microphone amplifies that sound and lets a trained technician walk it down: louder near the source, quieter as the mic moves away. The technician uses that signal to pinpoint and mark the leak location.
Can you really find leaks through walls and floors without opening them?
Yes, when the leak is pressurized and continuous. Acoustic and thermal methods work through drywall, tile, and finished flooring. Slab leaks under several inches of concrete are findable too. That's a dedicated diagnostic with the same tools and a different protocol.
Do thermal imaging cameras see through walls?
Not exactly. A thermal camera reads the surface temperature of whatever it's pointed at. When moisture from a leak has reached the wall, ceiling, or floor material, the camera can make the temperature difference visible. If moisture has not yet affected the surface material, the camera alone will not see it, which is why it is one tool in the sequence and not the whole test.
What kinds of leaks can't be located non-invasively?
Slow drips, intermittent drain leaks that only show during fixture use, and leaks that have stopped on their own can be hard to locate acoustically, because there's no continuous signal. Those cases lean harder on pressure isolation, moisture mapping, and timing the visit to the symptom.
Do you mark the location precisely?
Yes. The technician marks the location on the wall, floor, or ceiling, photographs the marking, and notes it in the written report. Then we open one hole, in the right place, and make the repair.
How long does a hidden-leak inspection take?
Most visits run up to 1.5 hours. The test is priced by type, not by the clock, so a faster visit costs the same and gets the same written report.
Do I need a plumber, or do you do the repair too?
We do both. Our technicians locate the leak and perform the repair, so there is no handoff, no second appointment with a second company, and no plumber re-diagnosing what we already found. If you prefer to use your own plumber, our written report gives them everything they need.
Find the leak. Before you open the wall.
The cost of opening drywall, tile, hardwood, or slab in the wrong place is the whole reason this service exists. Confirming the location before any cut is made means one hole, in the right place, and a finish repair measured in hours, not weeks.
The repair starts with the right location.
- Call
- (916) 331-6443
Mon–Fri · 8a–5p · CA Lic. #393393 · Bonded & insured